Key takeaways
- studio acoustic treatment starts with listening tests and monitor placement, not foam shopping.
- The 45-minute reset is enough to expose bass nulls, reflection points, and stereo drift.
- Broadband panels beat thin foam for most bedroom production rooms.
- Bass traps make kick and sub decisions calmer, especially in house and EDM.
- Headphones, earbuds, and the car are still useful witnesses after the room improves.
- Software correction works better after the physical room problems are reduced.
Studio acoustic treatment stopped being theory for me when a kick that felt perfect at midnight vanished on a CDJ-3000 system the next day. studio acoustic treatment also stopped feeling expensive once I heard what two broadband panels and one boring tape measure did to a half-finished tech house record.
I wrote these notes after a stretch of bedroom sessions, a rented vocal booth job, and one messy custom production brief where the client kept asking why the bass sounded different in the car. The answer was not FabFilter Pro-Q 4. Not at first. The room was bending the decision before any plugin had a chance. This is the 45-minute pass I would do before touching another mix revision.
The studio acoustic treatment baseline was ugly
I started with the monitor level low, around 73 dB SPL at the chair, because loud rooms flatter bad choices. The track was a simple four-on-the-floor loop from Ableton Live 12: kick, offbeat bass, closed hat, one stab. No mastering chain. No Soothe2. Just the room telling on itself.
The first pass of studio acoustic treatment was not about buying foam. It was about finding the lies. My desk was shoved against the wall, the Yamaha HS8s were too wide, and the right speaker fired straight into a bare plaster side wall. I had been mixing with a phantom center that leaned a few degrees left. Small thing. Big damage.
My studio acoustic treatment baseline test
I played pink noise, then a reference track I know too well: a dry, punchy house record with a kick fundamental sitting around 55 Hz. I walked from the chair to the back wall. The low end jumped by what felt like 8 dB near the wardrobe. At the chair, 90 Hz dipped enough that I kept overfilling the bass.
That is the first lesson. studio acoustic treatment starts with a repeatable test, not a shopping basket. If the room makes 90 Hz disappear, you will add 90 Hz. Then the club system punishes you.
The fast notes I wrote down
I kept the notes crude because crude notes get used. Chair distance from front wall. Speaker distance from side walls. Desk height. Whether the kick sat in the center. Whether the clap sounded like one hit or two hits. I marked the floor with masking tape, then moved one thing at a time.
- Monitor tweeters at ear height, not vaguely near it.
- Speakers forming an equilateral triangle with the chair.
- At least -6 dB of mix headroom during checks.
- Reference track level matched by ear before judging tone.
- Play one familiar reference before moving anything.
- Mark the chair and speaker positions with tape.
- Keep monitor level moderate so the room does not hype itself.
- Listen for center image drift before reaching for EQ.
Moving the desk beat buying foam
The cheapest studio acoustic treatment move was dragging the desk 28 cm forward. Not heroic. Not pretty. It cleaned the kick more than the thin gray foam squares I used years ago and later regretted.
I tried the chair at three positions across the room length. The worst spot was dead center, where the bass felt hollow. The better spot was roughly 38 percent from the front wall. That old rule is not magic, but it gave me a starting point that behaved.
Speaker distance changed the bass
I pulled the monitors off the wall until the rear ports had breathing room, then pushed them back in small steps. On the HS8s, the low end shifted fast. On smaller Kali LP-6 monitors, the change was still there but less dramatic. I would rather lose a little desk space than mix into a bass null for six months.
For bedroom producers chasing ghost production references, this matters because the client usually hears the track on headphones, a car, and a Bluetooth speaker before they hear your treated room. Translation is the product.
What I left alone
I did not touch monitor calibration software yet. Sonarworks or ARC can help, but I do not trust software to fix a speaker firing into a naked corner. Physical placement first. Correction second. That order has saved more mixes for me than any clever EQ curve.
- Try the chair away from the room center.
- Keep left and right speaker distances symmetrical.
- Avoid placing monitors directly in corners.
- Check mono before deciding the stereo image is fixed.
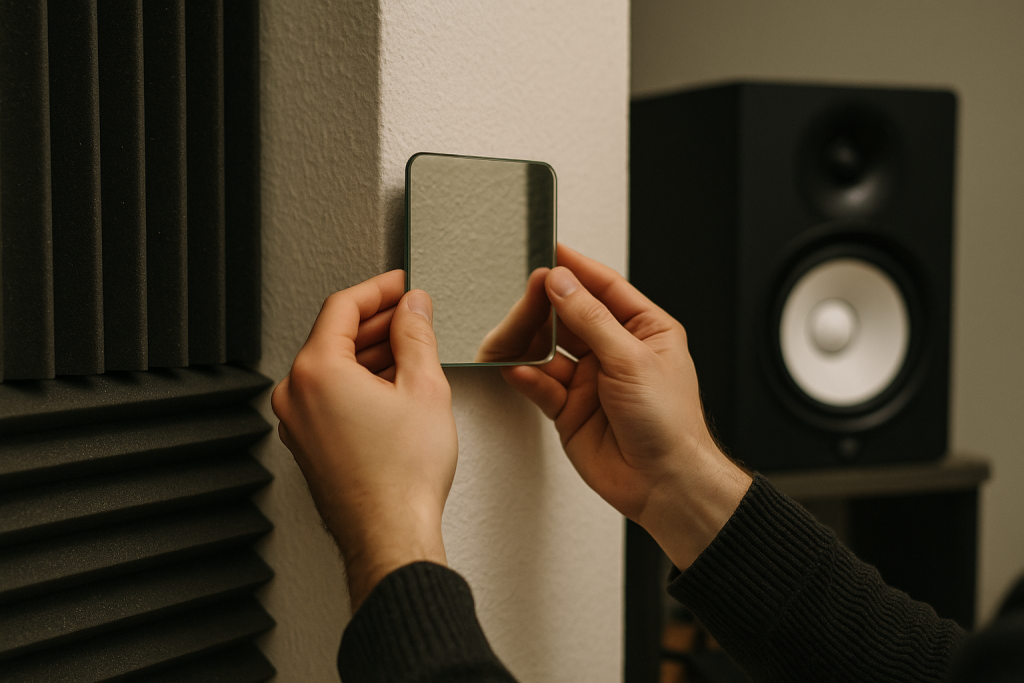
The mirror trick still earned its keep
I used the mirror trick again, and it still worked. A friend slid a small mirror along the side walls while I sat at mix position. Wherever I could see a monitor driver in the mirror, I marked a first reflection point. Basic studio acoustic treatment does not get much less glamorous than painter’s tape on a wall.
Then I hung two broadband panels, 100 mm thick, with a small air gap behind each one. The snare stopped smearing. The vocal reverb tail became easier to judge. The stereo width from a mid/side EQ move in Pro-Q 4 finally sounded like width, not wall splash.
Thin foam did not fix the problem
Thin foam ate a bit of top end and left the low mids alone. That made the room feel darker without making it more honest. I have made that mistake. Many DJs do. Foam looks like treatment, so we assume the room is handled.
For studio acoustic treatment in a small room, broadband absorption beats decorative foam almost every time. If a panel cannot touch the low mids around 150 to 300 Hz, it will not fix the boxy part of a vocal or the wool around a kick.
Ceiling cloud, if the room allows it
The ceiling reflection was worse than I expected. A cloud above the desk tightened the center image more than the rear wall panel did. I have not tested this exact setup on Logic 11 yet, but in Live 12 the same vocal comp stopped sounding phasey when I moved from headphones to monitors.
- Mark both side-wall reflection points from the chair.
- Use broadband panels, not thin decorative foam.
- Leave an air gap behind panels when possible.
- Treat the ceiling if claps and vocals smear upward.
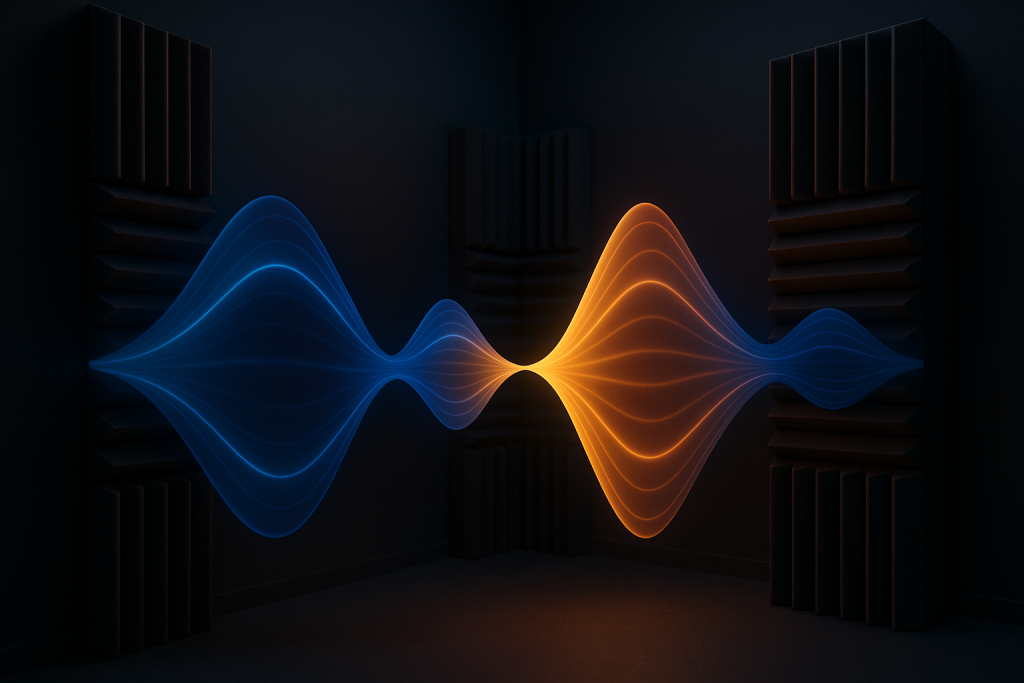
Bass traps made the kick boring in a good way
The first corner trap felt underwhelming for ten minutes. Then I bypassed the limiter on a rough master, played the kick and bass alone, and realized I was no longer guessing every note below 100 Hz. Good studio acoustic treatment often sounds boring because the room stops adding drama.
I stacked traps in the front corners first. Floor-to-ceiling would have been better, but real bedrooms have shelves, doors, and landlords. Even partial coverage helped. The kick’s 55 Hz thump no longer bloomed into a fake tail after every hit.
Low-end decisions got smaller
Before traps, I kept carving the bass at 220 Hz because the whole groove felt cloudy. After traps, that cut became 2 dB instead of 5 dB. Sidechain ducking also got easier to set. I could hear whether the compressor release was breathing with the groove or just pumping because the room had stopped ringing over the answer.
That is the quiet value of studio acoustic treatment. It does not write a better bassline. It lets you hear the one you already wrote.
Where I would spend first
If the budget is tight, I would buy or build four serious broadband traps before spending on a boutique compressor plugin. A plugin can shape a decision. A bad room corrupts the decision before the plugin opens.
- Front corners first for most small rooms.
- Rear corners next if bass builds behind the chair.
- Thicker panels over thin foam every time.
- Symmetry matters more than a perfect-looking wall.
- Trap corners before decorating the side walls.
- Judge kick length with the limiter bypassed.
- Use the same reference track after every change.
- Do not over-EQ bass until the room behaves.

Headphones told me what the room still missed
I do not trust headphones alone, but I trust them as a witness. After the basic studio acoustic treatment pass, I checked the same loop on Audeze LCD-X, Beyerdynamic DT 770 Pro, and cheap earbuds. The room had improved, but the sub relationship still needed a second opinion.
The treated room gave me groove and punch. Headphones gave me left-right detail and tiny clicks. The car gave me the truth about the low mids. I kept a notebook page for all three because memory lies after three versions of the same drop.
Translation checks, not panic checks
I bounced a 60-second section with no master limiter, then listened outside the room. If the bass vanished everywhere, that was not a room issue anymore. If the bass only vanished at the desk, the room was still lying. This saved me from chasing a 70 Hz boost that would have wrecked the master.
For artists buying custom production, this is also a useful listening habit. Ask whether the record translates, not whether it sounds huge on one playback system.
My small-room reference chain
The chain was boring by design: monitors, open-back headphones, earbuds, car. Same 4-bar phrase. Same loudness ballpark. I used Metric AB for references and kept Pro-Q 4 open only as a meter at first. No heroic mastering moves while diagnosing the room.
- Check the same 60-second section everywhere.
- Use headphones to spot clicks, edits, and stereo imbalance.
- Use monitors to judge punch and front-to-back depth.
- Use the car for low-mid buildup around 120 to 250 Hz.

The 45-minute reset I would repeat
This was the repeatable version. No big renovation. No acoustic modeling degree. Just a studio acoustic treatment reset that made the next session less slippery.
I would do it before a serious mix, before sending stems to a vocalist, and definitely before approving a ghost-produced track for release. The point is not perfection. The point is fewer bad calls made with confidence.
The studio acoustic treatment timer
Minute 0 to 10: place the chair and monitors symmetrically, then mark the floor. Minute 10 to 20: play pink noise and a reference, walk the room, find the worst bass zones. Minute 20 to 30: mark reflection points with the mirror trick. Minute 30 to 40: hang or reposition panels. Minute 40 to 45: bounce a short loop and check headphones.
If you only have rented walls and no drilling allowed, use stands. If stands are impossible, lean panels safely behind the desk and at the side points during mix sessions. Temporary studio acoustic treatment still beats pretending the room is neutral.
What I would not overthink yet
I would not start with diffuser math in a tiny bedroom. I would not buy twelve random foam tiles because a product photo looked serious. I would not calibrate monitors before fixing obvious placement problems. Harsh opinion, maybe, but I have watched too many producers spend plugin money to avoid moving furniture.
- 0-10 minutes: align chair and monitors.
- 10-20 minutes: map bass with a reference track.
- 20-30 minutes: mark first reflections.
- 30-40 minutes: place broadband absorption.
- 40-45 minutes: bounce and translation-check.
| Problem heard | First move | Tool or material | My take |
|---|---|---|---|
| Kick disappears at the chair | Move chair and monitors | Tape measure, pink noise | Do this before buying anything. |
| Clap smears sideways | Treat first reflection points | 100 mm broadband panels | Best early win for stereo decisions. |
| Bass blooms after each note | Add corner trapping | Thick bass traps | Spend here before another plugin. |
| Mix sounds dull but still muddy | Remove thin foam and add broadband absorption | Rockwool or fiberglass panels | Thin foam often hides the real issue. |
| Room is better but still uneven | Measure and consider correction | Room EQ Wizard, Sonarworks, ARC | Useful after placement and panels, not before. |
Further reading
- Sound On Sound room treatment — Sound On Sound is a long-running professional audio publication with practical studio acoustics advice.
- Genelec monitor placement — Genelec is a respected studio monitor manufacturer with clear technical guidance on speaker positioning.
Frequently asked questions
What is the best studio acoustic treatment for a bedroom?
Start with monitor placement, first reflection panels, and corner bass traps. I would skip thin foam unless you only need mild flutter control. Bedroom studio acoustic treatment works best when it handles low mids and bass, not just bright reflections above the desk.
Can I mix music without treating my room?
You can, but you will work slower and second-guess more. Use good headphones, reference tracks, and car checks if treatment is impossible. Still, even two broadband panels at the side reflections can make panning, reverb, and vocal brightness easier to judge.
Are bass traps necessary for EDM and house music?
Yes, if you make bass-heavy music in a small room. Kicks, subs, and offbeat basslines expose room modes fast. Bass traps help you hear whether the groove is tight or whether the room is adding fake sustain after every low note.
Where should I put acoustic panels first?
Put panels at the left and right first reflection points, then consider a ceiling cloud above the desk. After that, treat corners for bass. If the rear wall is close behind your chair, a thick panel there can also reduce slap and low-mid buildup.
Does acoustic foam work for music production?
Thin foam can reduce flutter echo, but it usually does little for low mids and bass. That can make a room sound dull while the mix still translates badly. For production work, thicker broadband panels and bass traps are a better first investment.
Should I use room correction software before acoustic panels?
I would not start there. Room correction can refine a decent setup, but it cannot fully fix bad speaker placement, bare reflection points, or ringing corners. Place the desk, add basic treatment, then measure and use correction carefully if needed.
Conclusion
The useful part of studio acoustic treatment is not owning perfect panels. It is removing enough room noise that your next decision survives outside the bedroom. After this pass, my kick edits got smaller, my bass EQ got less dramatic, and vocal reverb stopped feeling like a coin toss.
If you have 45 minutes before your next session, do the reset: align the chair, check the bass, mark reflections, place whatever broadband absorption you have, and bounce one short loop. Then leave the room and listen somewhere honest. Try this in your next session before you open another corrective plugin.
Studio acoustic treatment — Quick Recap
The fastest way to lock in studio acoustic treatment is to internalise the workflow above and repeat it on every project. Start small: pick one technique from this studio acoustic treatment guide, apply it to your next session, and audit the result against a reference track.
- studio acoustic treatment starts with listening tests and monitor placement, not foam shopping.
- The 45-minute reset is enough to expose bass nulls, reflection points, and stereo drift.
- Broadband panels beat thin foam for most bedroom production rooms.
- Bass traps make kick and sub decisions calmer, especially in house and EDM.
Treat studio acoustic treatment as a habit, not a one-off — the producers who consistently nail studio acoustic treatment are the ones who run the same checks on every track. That’s the difference between a clean, club-ready master and a track that sounds great at home but falls apart on a real system.
In a real studio session, studio acoustic treatment comes down to the order in which you make decisions: reference first, gain stage second, then the creative work. Producers who treat studio acoustic treatment as a checklist instead of a vibe end up shipping more tracks.
Most producers and DJs undervalue studio acoustic treatment because the wins are invisible until the track plays back on a real system. Bake studio acoustic treatment into your template and the next ten projects benefit automatically.
My Career makes videos from your own track and posts them for you, pitches your release to 34,000+ labels, playlists, radio stations, YouTube channels and blogs, puts it in every store and briefs you every morning. Free plan, no card, two minutes to set up.