 By Alex Mercer · September 30, 2026
TL;DR
- The original iLoud Micro pair works best at 60 to 90 cm listening distance.
- Treat them as close nearfields, not full-range main monitors.
- Calibrate around 72 to 76 dB SPL for reliable small-room balance work.
- Use headphones, metering and references for sub decisions below 60 Hz.
- Choose Micro Monitor Pro or iLoud MTM if calibration and main-monitor accuracy matter more than size.
- Check listings carefully because pair, single and Pro model pricing can be confused.
Ik iloud micro monitors are tiny enough to sit beside a laptop, which is exactly why they get bought for rooms that are too small for most 5-inch boxes. ik iloud micro monitors are not magic, and that is fine. The useful question is narrower: can a 3-inch, DSP-controlled nearfield pair help a bedroom producer make mix decisions that survive headphones, phones, cars and a club system?
Short answer: yes, if you treat them like precision desktop tools rather than full-range mains. Keep the listening distance short, calibrate level, stop guessing below 60 Hz, and check kick-bass balance somewhere else before final delivery. This is a practical iLoud Micro Monitor review for producers and DJs working in untreated or half-treated rooms, not a brochure rewrite. Specs matter. Placement matters more. Low end still wins arguments.
Ik iloud micro monitors: What the Small Box Does
The original IK Multimedia iLoud Micro Monitor pair is built around a 3-inch woofer, a 3/4-inch tweeter, internal DSP and 50 W RMS total amplification across the pair. Published response is commonly listed around 55 Hz to 20 kHz. That 55 Hz number is useful, but it should not be read like the monitor is flat to sub range. It is not.
The value is the midrange, size and controlled desktop behavior. For writing, editing, vocal comping, arrangement and most balance decisions, the boxes are more honest than many cheap 5-inch monitors placed badly on a desk.
Where ik iloud micro monitors make sense
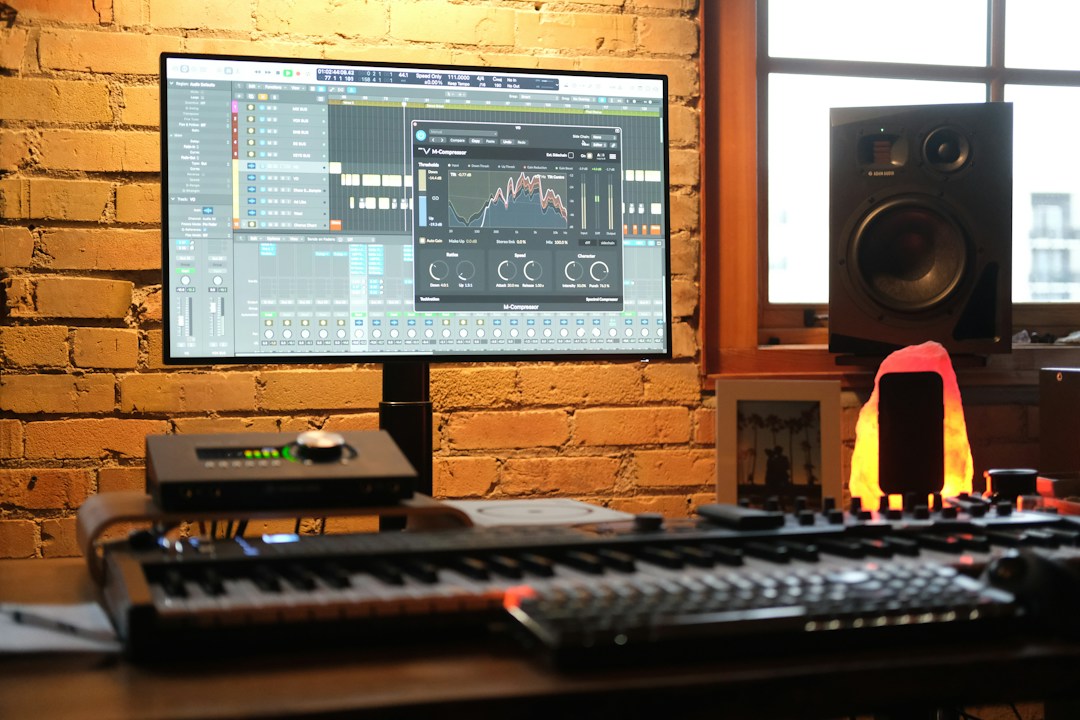
Use them at 60 to 90 cm from your head. That is the zone. At that distance the direct sound beats the room earlier than it would with bigger speakers on stands 1.5 m away. In a 2.8 m by 3.4 m spare room, that matters more than another inch of woofer.
The rear panel switches are not decoration. Start with LF Extension at 55 Hz, Desktop switch engaged if they sit on a desk, and HF flat. If the top end feels sharp at low level, do not immediately cut 8 kHz in every mix. Try the HF trim first.
What the spec sheet does not fix
A small woofer still moves a small amount of air. Kick fundamentals at 45 to 55 Hz, sub bass notes around 41 Hz, and drum and bass weight under 50 Hz need another reference. The textbook answer says buy the flattest monitor you can afford. In a bad room, the more useful answer is often: buy the monitor you can place correctly and learn quickly.
These monitors expose vocal level, snare brightness, synth masking around 300 Hz, and overcooked stereo widening. They will not tell the whole truth about 35 Hz. No 3-inch speaker will.
- Best listening distance: roughly 60 to 90 cm.
- Useful bass judgment starts around 60 Hz, not 30 Hz.
- Desktop switch is worth testing before EQing the room.
- Bluetooth is for casual checking, not mix decisions.
- RCA and 3.5 mm inputs are unbalanced, so cable discipline matters.
Room Size, Placement and the Textbook Answer That Fails
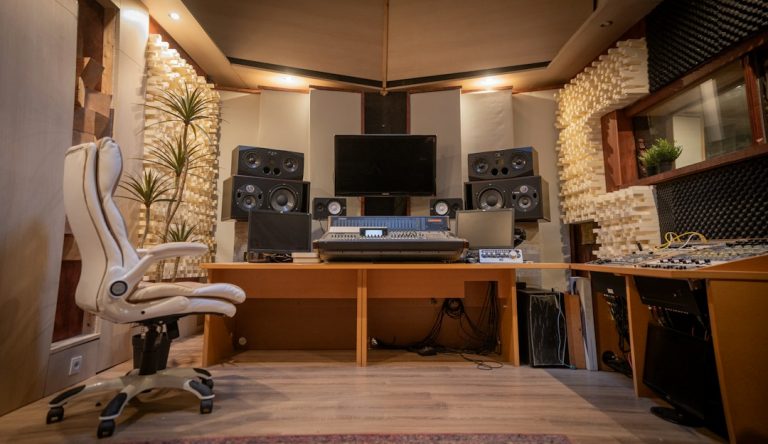
Small monitors do not remove room acoustics. They just reduce the room’s vote. Put the speakers on a hollow desk against a bare wall and you will still get boundary lift, comb filtering and a vague stereo center. The iLoud format is forgiving, not immune.
For most bedroom rooms, the first correction is physical. No plug-in fixes a speaker firing into a laptop screen, a wall 8 cm behind it and a glass window on one side.
Start with geometry, then treatment
Place the speakers so the tweeters are at ear height. Make an equilateral triangle if the desk allows it. A 70 cm speaker-to-speaker width and 70 cm speaker-to-head distance is a reasonable first setup for these boxes. Toe them in until the phantom center locks. If the vocal wanders, your symmetry is wrong.
Keep each cabinet the same distance from the front wall. A 5 cm mismatch can skew the image. If stands are possible, use them. If not, use dense isolation pads and measure the desk height rather than guessing.
Boundary settings before room correction
The rear switches are crude compared with full room correction, but crude is fine when the problem is obvious. If the monitors sit directly on a desk, try the Desktop cut. If the wall behind them exaggerates low-mid punch, compare LF 55 Hz against LF 80 Hz. The 80 Hz setting can sound thinner alone, then translate better outside the room.
Do not chase a perfect analyser line with these. Fix big placement errors first: left-right symmetry, tweeter height, desk reflections and back-wall distance.
Treatment order for tiny rooms
Spend on treatment before a sub. Two broadband absorbers at first reflection points, one thick panel behind the listening position and some front-corner trapping will do more for these monitors than a larger woofer fighting the same untreated corners.
A 10 cm mineral-wool panel with an air gap is more useful than thin foam. Foam kills some flutter and leaves the low-mid mess in place. That is how mixes become dull and still boomy.
- Aim tweeters at ear height, not chest height.
- Match left and right wall distances within a few centimeters.
- Use the Desktop switch when the cabinets sit on a reflective desk.
- Treat first reflection points before buying a subwoofer.
- Check mono often; small speaker placement errors show up fast.

Gain Staging and Calibration for a 3-Inch Monitor
Most bad decisions on small monitors happen too loud. The woofer compresses, the low end feels smaller, and the producer adds bass to compensate. Then the car test is a swamp at 90 Hz. Calibrate a repeatable level and stay near it for balance work.
You do not need a laboratory. You need a pink-noise file, an SPL meter app or handheld meter, and five minutes of discipline.
A workable calibration target
Set your audio interface output at its normal working position. Play -20 dBFS RMS pink noise through one speaker at a time. At the listening position, set each side to about 72 to 76 dB SPL C-weighted, slow response. For a very small room, 72 dB is enough. For short checks, 78 dB is fine. Do not mix all afternoon there.
Leave your DAW master peaking around -6 dBFS while working. If you print rough masters, do that after the mix balance is stable, not while the monitor amp is being pushed.
Interface and cable settings
The original IK Multimedia iLoud Micro Monitor pair uses unbalanced inputs. Keep cable runs short. A 1 m RCA cable from an audio interface is usually quiet. A 4 m unbalanced run past a power supply is asking for hum.
If your interface has balanced TRS outputs, use proper TRS-to-RCA or dual TS wiring depending on the output design, and keep the monitor input gain conservative. Noise floor is more obvious at close listening distance because your head is near the tweeters.
Reference level beats random volume
Pick three positions: quiet edit level around 60 to 65 dB SPL, normal mix level around 72 to 76 dB SPL, and a short loud check near 80 dB SPL. Mark the interface knob with tape. Boring, but repeatable.
When a kick only works at loud level, it does not work. At normal level, the transient should be obvious, the bass note should be readable, and the vocal should not vanish when the groove enters.
- Use -20 dBFS RMS pink noise for setup.
- Calibrate one speaker at a time.
- Work around 72 to 76 dB SPL in small rooms.
- Keep mix peaks near -6 dBFS before limiting.
- Use short unbalanced cables to reduce hum.
Low-End Translation: Kick, Bass and the Sub Trap
The weak point is predictable: sub judgment. The fix is not pretending the monitor has another octave. Build a translation routine. On dance music, this is not optional. We see this constantly across house, techno, trance, EDM and drum and bass sessions: the arrangement is fine, the drop is fine, and the 45 Hz area is fiction.
Use the iLouds for mid-bass shape and timing. Use headphones, reference tracks and metering for the octave they cannot reproduce with authority.
Separate fundamental from audible bass
A kick with a 48 Hz fundamental can still read on small monitors if the 90 to 120 Hz body is controlled and the click around 2 to 4 kHz is not excessive. A bass line can survive a phone speaker if the second harmonic is present. Saturation is not decoration here; it is translation.
Try a gentle saturator on a duplicated bass band above 120 Hz, then high-pass that duplicate at 100 Hz and blend it 10 to 18 dB below the clean bass. The small monitors will reveal whether that added harmonic turns into mud at 180 to 250 Hz.
Sidechain settings that do not lie
For four-on-the-floor material at 124 to 128 BPM, start with sidechain ducking around 4 to 7 dB, attack under 2 ms, release 90 to 140 ms. Then adjust by groove, not by preset. If the release is too long, the bass breathes like a pump. If it is too short, the kick and bass fight at the front edge.
On the ik iloud micro monitors, listen to the upper-bass recovery after the kick. The sub may be partly implied, but the timing problem will still show up.
Metering checks for the missing octave
Use a spectrum analyser, but do not mix with your eyes glued to it. A steady sub shelf that is 8 dB louder than your reference at 45 Hz is a problem, even if the small speakers sound calm. Compare against a lossless reference at matched loudness, not a crushed stream at random level.
Check mono below 120 Hz. If widening plug-ins touch the sub band, remove that width. Club systems and festival rigs are still mostly unforgiving below 100 Hz.
- Use headphones to verify 35 to 60 Hz decisions.
- Match references within about 1 dB before judging tone.
- Keep sub bass mono below 100 to 120 Hz.
- Check kick body around 90 to 120 Hz on the monitors.
- Use saturation for audibility, not fake loudness.

Buying Check: ILoud Micro Monitor Price, Pair and Pro Options
The iLoud Micro Monitor price usually puts the original pair in the serious budget category, not the toy category. Street prices move, so check current dealer listings rather than relying on an old forum post. The phrase to watch is pair. Some newer iLoud models are sold as single monitors.
If you are searching for ik iloud micro monitors for sale, confirm the exact model name, color, included cables and whether the listing is for one speaker or two. Used listings often bury that detail.
Original pair versus Micro Monitor Pro
The original pair is the portable desktop option: compact, simple, unbalanced inputs, Bluetooth for casual playback, no built-in calibration mic workflow. It suits writing rooms, hotel work, small desks and producers who need a known reference beside headphones.
The iLoud Micro Monitor Pro is the more serious single-speaker platform. Depending on package and region, it moves toward balanced connectivity, calibration support and a more studio-facing workflow. If you need matched left-right calibration and cleaner cabling, I would skip the original and price the Pro pair properly.
New, used and return policy
Buying used is reasonable if the tweeters are clean, the rear switches do not crackle and both speakers produce equal level. Play pink noise, sweep from 60 Hz to 12 kHz, and listen for buzzes. A desk fall can loosen more than the grille.
For new buyers, the return policy matters. These monitors interact heavily with desk placement. If they do not work in your room after correct setup, a larger spec sheet will not save them.
What to budget besides the speakers
Budget for isolation pads or short stands, short cables, and at least two broadband panels if the room is bare. Spending every dollar on the monitor and leaving it on a resonant desk is false economy.
A sensible small-room chain is simple: audio interface, short cables, ik iloud micro monitors, calibrated level, and good open-back headphones for sub checks. The headphones are not a replacement. They are the missing bottom octave and detail microscope.
- Verify whether the listing is a pair or a single unit.
- Check rear switches, tweeters and cabinet buzzes when buying used.
- Save budget for pads, stands and basic treatment.
- Prefer a dealer with returns if your room is untreated.
- Do not pay Pro money for the original model by accident.
Alternatives: ILoud MTM, Micro Monitor Pro and ADAM D3V
The small-monitor category is crowded because small rooms are normal now. The original Micro pair still has a place, but it is not the automatic answer. If your desk allows a taller speaker, if you need balanced inputs, or if your work is bass-heavy club music every day, price the alternatives before buying.
The iLoud MTM, iLoud Micro Monitor Pro and ADAM Audio D3V each solve a different problem. Choose by room and workflow, not by the loudest product page.
When iLoud MTM is the better choice
iLoud MTM is physically larger and aimed at more serious nearfield work. The MTM driver layout gives better vertical control when placed correctly, and built-in calibration is a major advantage in awkward rooms. It still needs sensible placement. Calibration cannot fix a speaker wedged behind a laptop.
If you produce kick-heavy techno, trance or drum and bass and this is your main mix system, I would rather see MTMs on proper stands than the original Micro pair on a desk. The cost is higher, but so is the decision quality.
Where ADAM D3V competes
ADAM D3V sits in the compact desktop monitor lane with modern connectivity and a different voicing. The useful comparison is not brand loyalty. It is inputs, desk footprint, published low-end extension, service support and how the tweeter behaves at close range.
If USB-C desktop convenience matters, the D3V deserves a look. If you already run a proper audio interface and want the smallest known reference, the original iLoud remains a cleaner fit. I would not choose either without checking return terms.
The blunt recommendation
Buy the original Micro pair if space is the hard limit. Buy Micro Monitor Pro if balanced inputs and calibration are worth the extra spend. Buy iLoud MTM if this is your main production monitor and the room can handle the size. Consider D3V if desktop connectivity is central to your setup.
The ik iloud micro monitors are best treated as disciplined nearfields for small spaces. Push them into full-range main-monitor duty and they will eventually make you guess.
- Original Micro pair: smallest practical iLoud option.
- Micro Monitor Pro: better fit for calibrated studio workflows.
- iLoud MTM: stronger main-monitor candidate for production rooms.
- ADAM D3V: worth checking for modern desktop connectivity.
- Subwoofer: last step, not first step, in an untreated room.
| Model | Best Use | Key Trade-Off | Practical Verdict |
|---|---|---|---|
| IK Multimedia iLoud Micro Monitor pair | Very small desks, travel writing rigs, close nearfield work | Unbalanced inputs and limited authority below roughly 55 to 60 Hz | Best when space is the main constraint |
| iLoud Micro Monitor Pro | Small studio rooms needing calibration and cleaner integration | Usually priced as a more serious single-monitor system | Better buy if balanced workflow matters |
| iLoud MTM | Main nearfield mixing in compact treated rooms | Larger footprint and higher cost than the Micro pair | Stronger choice for club-focused production |
| ADAM Audio D3V | Desktop producers wanting compact monitors with modern connectivity | Different voicing and workflow from the iLoud line | Audition if USB-style desktop setup is a priority |
FAQ
Are ik iloud micro monitors good for mixing?
Yes, if you mix at close range and understand the bass limit. They are useful for balance, midrange, vocal level, stereo placement and arrangement work. They are not enough on their own for confident sub decisions below about 55 to 60 Hz. Use headphones or another system for that range.
Where can I buy iLoud Micro Monitors?
Buy from IK Multimedia’s own store, authorised music retailers, or reputable used marketplaces with buyer protection. Check whether the listing is for the original pair, a single Micro Monitor Pro unit, or another iLoud model. For used purchases, test both speakers with pink noise and a slow frequency sweep.
What are the differences between iLoud Micro and iLoud Pro monitors?
The original iLoud Micro Monitor is a compact pair aimed at portable and desktop use, with simple inputs and no full calibration workflow. iLoud Micro Monitor Pro is aimed more at studio integration, with more professional connectivity and calibration-oriented features depending on package. The Pro route costs more but suits permanent rooms better.
What are the differences between iLoud Micro and D3V monitors?
iLoud Micro is the older compact reference choice with a tiny footprint and established desktop use. ADAM D3V is a newer compact desktop monitor with a different driver approach, connectivity focus and voicing. Pick by inputs, space, return policy and how each behaves at your actual listening distance, not by published bass numbers alone.
Do iLoud Micro Monitors need a subwoofer?
Not at first. In most small untreated rooms, a subwoofer adds more problems than answers. Learn the monitors, treat the room and use headphones for sub checks. Add a sub only if you can place it properly, calibrate crossover and level, and measure the listening position.
What is a fair iLoud Micro Monitor price?
Street prices vary by country, color, stock and whether the listing is new or used. Compare current authorised dealers and confirm that the price is for a pair. If a price looks unusually low, check the exact model name, included power supply, cable set and return terms before paying.
The bottom line
ik iloud micro monitors make sense when the room is small, the desk is crowded and the work still needs to translate. They are not a loophole around physics. The woofer is small, the inputs on the original pair are basic, and sub-bass decisions need another reference. Used correctly, they are a useful production tool: close placement, calibrated level, short cables, sensible rear-switch settings and regular checks against known tracks.
If you are deciding between the original pair, Micro Monitor Pro, iLoud MTM or ADAM D3V, start with the room. Measure the desk. Mark the listening distance. Set a repeatable SPL. Then run one unfinished track through the setup and check it on headphones and a car system before making the purchase permanent.
My Career makes videos from your own track and posts them for you, pitches your release to 34,000+ labels, playlists, radio stations, YouTube channels and blogs, puts it in every store and briefs you every morning. Free plan, no card, two minutes to set up.