Key takeaways
- A lean Ableton template beats a giant session with 60 unused tracks.
- Push 3 helps most when it captures ideas before the mouse slows you down.
- Utility, Drum Rack, EQ Eight, and Glue Compressor still do serious work.
- Paid plugins should solve repeat problems, not decorate every channel.
- Reference tracks belong in the template, routed around the master chain.
- Clean stems are part of professional production, not an afterthought.
Ableton workflow tips work when they remove tiny decisions before they steal the session. The point of ableton workflow tips is not to decorate your DAW with color tags. It is to make the first 20 minutes of a beat, remix, DJ edit, or client demo feel automatic.
I use Ableton Live 12 for writing, arranging, stem prep, and rough masters. The tools below are the ones that keep showing up: Ableton Push 3, Utility, Drum Rack, FabFilter Pro-Q 4, Soothe2, LFO Tool, XO, and a boring but lethal default template. Some are stock. Some cost money. The rule is simple: if it does not save time or prevent bad decisions, it does not stay in the session.
Ableton workflow tips That Cut Setup Time
Start with a default set that already knows what kind of track you are making.
A blank Ableton set is fine for experiments. For finished music, it is a tax. My default set opens with eight MIDI tracks, four audio tracks, drum returns, sidechain routing, reference track input, and a master chain that is muted until the rough mix makes sense.
Ableton workflow tips for default sets
The best default set is not huge. Huge templates turn into abandoned sessions. Keep it lean: one Drum Rack, one bass synth slot, two lead slots, one vocal chop track, one resampling track, and returns for short room, long reverb, delay, parallel compression, and sidechain key.
Put Utility on every group. Set the master to peak around -6 dB before any limiter. That one habit makes collaboration, custom music production, and ghost production handoffs less messy because nobody has to rescue clipped stems later.
- Default BPM: 124 for house, 140 for garage or dubstep drafts
- Master headroom target: -6 dB peak before limiting
- Color drums, bass, music, vocals, FX, and references
- Create a muted sidechain key track from the first kick pattern
- Save the set before adding third-party plugins
Push 3 for Fast Ideas, Not Showing Off
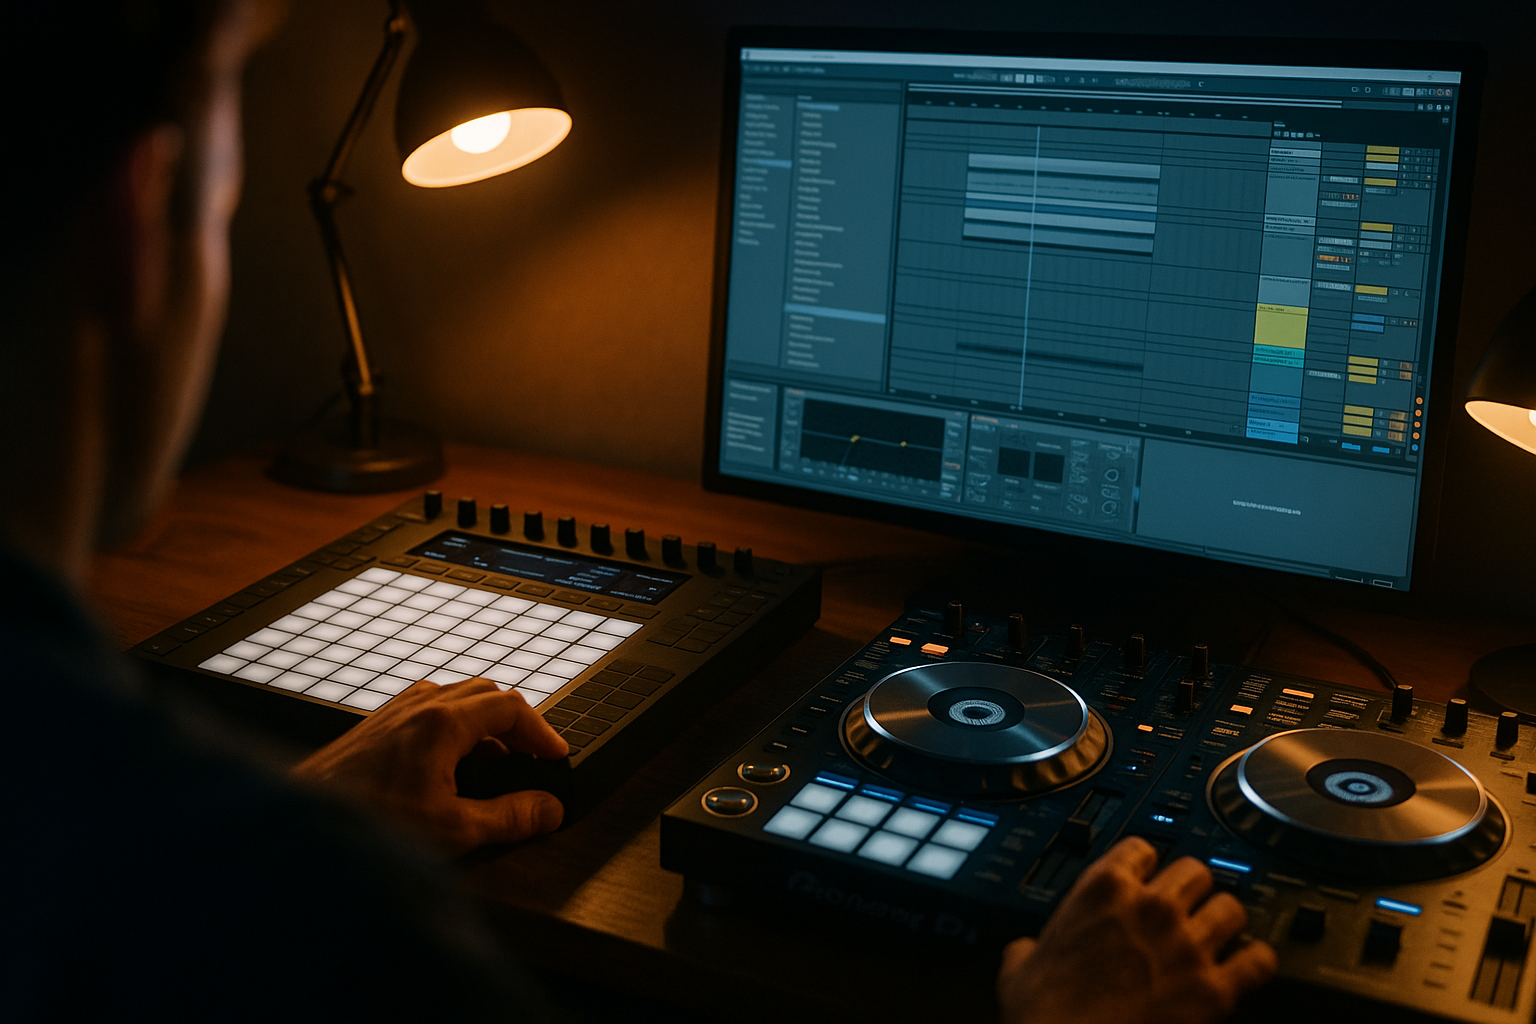
Ableton Push 3 earns its spot when it keeps your hands off the mouse during the first loop.
The trap with hardware is pretending it fixes weak ideas. It does not. Push 3 is useful because it makes clip recording, drum programming, and scale-based sketches quick enough that you stop judging every note too early.
Use pads before piano roll editing
For drums, set fixed length to 4 bars and record hats without quantize first. Then tighten with 55 to 70 percent quantize strength. Perfect hats sound fake in club music unless the groove is meant to be mechanical.
For melodies, keep Push in one scale while you sketch. These ableton workflow tips work because they reduce mouse edits at the wrong stage. Record three passes, mute two, and move on before the loop becomes wallpaper.
- Record 4-bar ideas before editing velocity
- Use repeat for trap hats, but print humanized ghost notes afterward
- Map macro 1 to filter cutoff and macro 2 to envelope amount
- Keep one audio track armed for resampling Push performances

Drum Rack Beats XO for Speed, XO Beats It for Browsing
Use Drum Rack for committing, XO for finding, and do not confuse the two jobs.
XLN Audio XO is brilliant when your sample folder is a graveyard. Its visual map makes it easy to find a tight 909 kick, a dusty rim, or a short clap without auditioning 300 files. Once the kit is chosen, I still move the core drums into Drum Rack.
Build one kit, then stop browsing
Sample browsing is where ableton workflow tips either help or become avoidance. Give yourself ten minutes. Pick one kick, one clap, two hats, one ride, and two percussion sounds. Then freeze the choice.
Inside Drum Rack, add Saturator lightly on the kick chain, EQ Eight after claps, and a Glue Compressor on the rack only if the groove needs glue. Do not compress dead drums because a tutorial told you to. Move the samples or replace them.
- Cut clap lows around 220 Hz if they fight the kick body
- High-pass open hats around 500 to 700 Hz when the mix is busy
- Use 1 to 2 dB of Glue gain reduction on drum bus, not 6 dB
- Save finished Drum Racks by genre and BPM range

Utility Is the Most Underrated Ableton Device
Utility fixes gain staging, width checks, mono safety, and automation cleanup without drama.
If I had to keep one stock device for professional sessions, Utility would be near the top. It is not sexy. It is also the reason stems arrive at sane levels and stereo bass mistakes get caught before export.
Put Utility where decisions happen
Put Utility first on every group. Trim hot synth presets down by 6 to 12 dB before they hit EQ or compression. Most plugin chains sound better when the input is not already screaming.
These ableton workflow tips matter for DJs too. If you are preparing a track for CDJ-3000 playback, check the drop in mono for kick, bass, and main hook stability. Wide sub tricks might sound big on headphones, then vanish on a club system summed through a weird booth chain.
- Use Bass Mono below 120 Hz on wide bass patches
- Map Width to a macro for breakdown automation
- Trim groups before compression, not after the limiter
- Check mono during the hook and the drop, not only the intro
FabFilter Pro-Q 4 for Surgical Fixes
Use stock EQ for broad moves, then reach for Pro-Q 4 when the problem is specific.
Ableton EQ Eight is fast and good. FabFilter Pro-Q 4 earns its keep when the session has clashing vocals, harsh synth stacks, or low-mid buildup that moves from note to note.
Mid/side EQ keeps drops wide without wrecking the center
One of the most useful ableton workflow tips is separating center problems from side problems. If a piano is masking the vocal, cut 2 to 3 dB around 1.5 kHz in the mid channel before touching the sides. If pads are too cloudy, pull 250 to 400 Hz from the sides instead of thinning the whole sound.
Use dynamic bands carefully. A dynamic cut at 220 Hz on a bass group can clean the kick pocket, but if the threshold is too low the groove starts breathing in the wrong way.
- Cut resonant synth peaks with narrow dynamic bands
- Use mid/side mode on pads, pianos, and backing vocals
- Do not high-pass every track by habit
- Match output gain after EQ moves before judging tone
Soothe2 Saves Harsh Ideas, but It Can Kill Bite
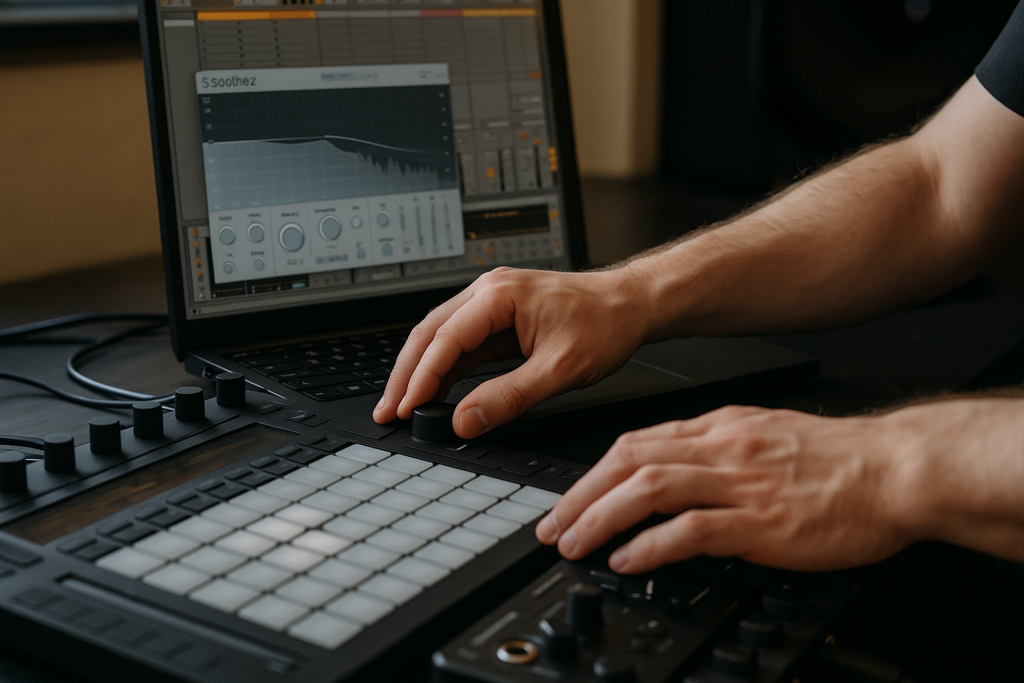
Soothe2 is a rescue tool, not a blanket you throw over every bright sound.
Harshness often comes from stacked excitement: Serum wavetables, OTT, bright samples, vocal air EQ, and limiter pressure all fighting at once. Soothe2 can calm that down fast. It can also make the hook feel expensive and boring if you overdo it.
Use Soothe2 before you reach for darker presets
For EDM leads, start with depth around 2 to 3, sharpness moderate, and focus the action between 2.5 and 7 kHz. Solo the delta briefly, then stop soloing. The mix decides, not the correction signal.
These ableton workflow tips are about restraint. If Soothe2 is pulling 8 dB all over the lead bus, the sound design is probably wrong. Go back to the synth, reduce unison brightness, or lower the distortion drive before asking a plugin to hide everything.
- Try Soothe2 on vocal chops before de-essing twice
- Avoid heavy depth on the main lead bus
- Bypass every 30 seconds while adjusting
- Print a treated copy if CPU starts choking

LFO Tool and ShaperBox Make Sidechain Repeatable
Draw the ducking curve once, save it, and stop rebuilding sidechain settings every session.
Compressor sidechain is still useful, especially when the kick pattern changes. For four-on-the-floor house, LFO Tool or Cableguys ShaperBox is faster and more predictable. You see the curve, you hear the pocket, and the bass stops arguing with the kick.
Sidechain ducking should serve the groove
Set a 1/4-note volume shape for house bass, then adjust the release curve until the bass returns just before the next kick. If the bass snaps back too early, the low end feels lumpy. If it returns too late, the groove loses weight.
For syncopated basslines, these ableton workflow tips need a second preset. Save one curve for straight house, one for offbeat bass, and one shallow version for pads. Pads usually need 1 to 3 dB of movement, not full pumping.
- Straight house bass: deeper 1/4-note ducking
- Pads and noise: shallow movement, 1 to 3 dB
- Breakdowns: automate mix amount down before the drop
- Ghost kick track: keep it muted but routed
Reference Tracks Belong Inside the Template
A reference track is only useful if level matching is boring and instant.
Dragging a reference in after the mix is already confused is late. Put a reference track in the template, route it straight to the master output, and bypass your processing chain. Then trim it until it feels as loud as your rough mix without cheating.
Reference arrangement, not just loudness
The best ableton workflow tips are often arrangement habits. Drop markers every 8 or 16 bars on a reference: intro, first hook, break, second drop, outro. If your track has a 32-bar dead zone before anything changes, the reference will shame you quickly.
Use Spectrum or SPAN to compare low-end shape, but do not copy curves like homework. A tech house record and a melodic techno record can both peak hard in clubs while carrying very different midrange energy.
- Route references around your master chain
- Level match by ear before checking analyzers
- Mark 8-bar or 16-bar phrase changes
- Compare kick length, bass sustain, and vocal height

Export Stems Like Someone Else Has to Open Them
Clean exports are part of the workflow, not admin you handle after midnight.
If you work with singers, rappers, DJs, labels, or ghost production clients, messy stems make you look amateur fast. File names, start points, tails, and headroom matter because the next person should be able to rebuild the track without guessing.
Commit before export
Before exporting, freeze heavy synths, flatten copies of unstable resampling chains, and print sidechain if the movement is essential. Keep dry MIDI versions if the project might come back for edits.
These ableton workflow tips save real pain on revisions. Export all stems from bar 1, even if the vocal starts at bar 49. Leave reverb tails. Name files like 124bpm_Dmin_drums_wet.wav, not audio_47_final_final2.wav. That filename should embarrass nobody.
- Export from bar 1 with all tracks aligned
- Leave 3 to 5 seconds of tail on FX stems
- Print wet and dry vocals when possible
- Keep peak levels below -3 dB on individual stems
- Include BPM and key in the folder name
| Tool | Best use | My take |
|---|---|---|
| Ableton Push 3 | Writing drums, basslines, and clip ideas without mouse edits | Worth it if you record ideas fast, wasted if you only mix |
| XLN Audio XO | Finding drum samples from huge folders | Use it for browsing, then commit the kit to Drum Rack |
| FabFilter Pro-Q 4 | Dynamic EQ, mid/side cleanup, and resonant cuts | Best paid EQ for surgical fixes in busy sessions |
| oeksound Soothe2 | Controlling harsh vocals, leads, and stacked synth buses | Powerful, but easy to overuse until the track loses bite |
| Xfer LFO Tool | Repeatable sidechain ducking for kicks, bass, pads, and FX | Faster than compressor sidechain for straight club grooves |
| Ableton Utility | Gain staging, mono checks, stereo width, and automation | Boring stock device, mandatory in my template |
Further reading
- Ableton Live manual — Ableton's official manual is the primary technical source for Live devices, routing, clips, and workflow features.
- Sound On Sound — Sound On Sound is a long-running professional audio publication with detailed production, mixing, and studio technique articles.
Frequently asked questions
What are the best ableton workflow tips for beginners?
Start with a small default template, not a giant one. Add Drum Rack, Utility on every group, a sidechain key track, four return effects, and one reference track routed around the master chain. Then write in 4-bar or 8-bar chunks before doing detailed mix work.
Is Ableton Push 3 worth it for bedroom producers?
Yes, if you record ideas faster with your hands than with a mouse. Push 3 is strong for drums, melodic sketches, clip launching, and resampling. If you mainly edit vocals or mix stems, spend the money on monitors, room treatment, or a better audio interface first.
Should I use Ableton stock plugins or paid plugins?
Use stock devices first for broad work. EQ Eight, Glue Compressor, Saturator, Drum Rack, and Utility can finish real records. Paid tools like Pro-Q 4, Soothe2, and LFO Tool make sense when they solve repeat problems faster than the stock chain.
How do I make Ableton sessions easier to finish?
Limit choices early. Pick a drum kit in ten minutes, write a rough arrangement before polishing loops, keep references in the template, and export rough bounces often. Most unfinished tracks do not need more plugins. They need fewer open decisions.
What Ableton template should I use for EDM?
Use groups for drums, bass, music, vocals, FX, and references. Add returns for room reverb, long reverb, delay, and parallel compression. Include a muted ghost kick track for sidechain routing and leave around -6 dB headroom before any rough limiter.
How should I export stems from Ableton for collaborators?
Export every stem from bar 1, keep all files aligned, leave FX tails, and name files with BPM, key, and part type. Print wet and dry vocal stems when possible. Keep peaks below -3 dB so the next producer is not fighting clipped audio.
Conclusion
ableton workflow tips only matter if they survive a real session with deadlines, tired ears, and too many sample packs open. Keep the template small. Use Push 3 when it speeds up writing, not because it looks good on the desk. Let Drum Rack, Utility, and clean routing handle the boring jobs. Bring in Pro-Q 4, Soothe2, XO, or LFO Tool when they solve a specific bottleneck.
The best test is simple: open Ableton, set a 30-minute timer, and build one 16-bar idea using only three of these tools. If the loop moves faster and the session stays cleaner, save that setup as your new default.
Ableton workflow tips — Quick Recap
The fastest way to lock in ableton workflow tips is to internalise the workflow above and repeat it on every project. Start small: pick one technique from this ableton workflow tips guide, apply it to your next session, and audit the result against a reference track.
- A lean Ableton template beats a giant session with 60 unused tracks.
- Push 3 helps most when it captures ideas before the mouse slows you down.
- Utility, Drum Rack, EQ Eight, and Glue Compressor still do serious work.
- Paid plugins should solve repeat problems, not decorate every channel.
Treat ableton workflow tips as a habit, not a one-off — the producers who consistently nail ableton workflow tips are the ones who run the same checks on every track. That’s the difference between a clean, club-ready master and a track that sounds great at home but falls apart on a real system.
In a real studio session, ableton workflow tips comes down to the order in which you make decisions: reference first, gain stage second, then the creative work. Producers who treat ableton workflow tips as a checklist instead of a vibe end up shipping more tracks.
Most producers and DJs undervalue ableton workflow tips because the wins are invisible until the track plays back on a real system. Bake ableton workflow tips into your template and the next ten projects benefit automatically.
When you struggle with ableton workflow tips, the fix is rarely a new plugin. Loop a problem section, A/B against a reference, and isolate which element is breaking your ableton workflow tips.
Treat ableton workflow tips as a craft, not a chore. The producers releasing on the biggest labels lock ableton workflow tips in early so they can spend their energy on melody and arrangement instead of fighting the mix.
Document your ableton workflow tips process — even a short note in the project file. Future-you will rebuild the same ableton workflow tips win in half the time.
My Career makes videos from your own track and posts them for you, pitches your release to 34,000+ labels, playlists, radio stations, YouTube channels and blogs, puts it in every store and briefs you every morning. Free plan, no card, two minutes to set up.